Quick Answer: To draw a bird, start with an egg shape for the body and a smaller circle for the head, then refine proportions, add the silhouette, map colour zones, and finish with feather texture and shading. The American Robin (Turdus migratorius) is the best bird to start with — its round-breasted, upright shape is forgiving, its field marks are bold and distinct, and it’s familiar enough that you’ll know immediately when something looks right.
The American Robin is the single best subject for anyone learning how to draw a bird drawing from scratch. It’s upright, round-breasted, and built from shapes you already know. Its field marks — that brick-red chest, the dark head, the broken white eye arcs — are bold enough to be satisfying but not so complex they’ll frustrate a beginner. Everything in this guide uses the Robin as its anchor, with notes on other popular species along the way.
How to Draw a Bird Drawing: The 5-Step Framework
Every bird drawing in this guide follows the same five steps:
- Block in basic shapes — egg body, circle head
- Establish proportions and posture — bill, eye, leg placement
- Add the silhouette and tail — wing edges, tail length
- Map field marks and colour zones — dark head, orange breast, gray back
- Refine details — feather texture, shading, fine markings
Why the American Robin Is the Best Bird to Draw First
The Robin’s silhouette is essentially a teardrop on legs. Its breast is the widest point of the body, it stands upright and alert, and its colour zones — dark head, orange-red breast, slate-gray back — are cleanly separated. You don’t have to guess where one area ends and another begins.
Compare that to a sparrow, where streaked brown plumage blends into itself and proportions are easy to misjudge. The Robin is forgiving, bold, and universally recognizable. If your drawing looks wrong, you’ll know it — and that feedback loop is what accelerates improvement.
Understanding Bird Anatomy Before You Draw
The Basic Shapes Behind Every Bird Silhouette
Every bird, from a hummingbird to a Great Blue Heron (Ardea herodias), breaks down into geometric primitives. For the Robin, that’s an egg-shaped body (roughly 9–11 inches / 23–28 cm long) and a smaller circle for the head. The legs are cylinders; the bill is a tapered wedge.
Starting with shapes keeps you from getting lost in detail before you’ve nailed the structure. I’ve watched beginners spend twenty minutes perfecting a wing feather on a drawing where the head is twice the correct size. Get the shapes right first — everything else follows.
Key Proportions: Head, Body, Tail, and Legs
The Robin’s head is roughly one-third the width of the body at its widest point. The legs attach near the centre of the body, which gives the bird its characteristic upright, alert posture. The bill is short and moderately stout — about 0.8 inches (2 cm) — with a slight downward curve at the tip.
The tail is medium length, neither stubby nor elongated. Nailing these proportions before adding any detail is the single biggest thing that separates a convincing bird drawing from one that looks “off.”
How Feather Groups Create Visual Zones
Think of feathers not as individual strands but as overlapping zones. The Robin has distinct tracts to observe separately: the head, the mantle (back), the wing coverts, the breast, and the undertail coverts. Each zone has its own colour, texture, and direction of feather growth.
The breast feathers lie flat and smooth, creating that round, full silhouette. The wing coverts have a slightly scalloped edge. Keeping these zones mentally separate will make your shading and texture work much more convincing.
American Robin Anatomy at a Glance
| Feature | Robin | Northern Cardinal (Cardinalis cardinalis) | Black-capped Chickadee (Poecile atricapillus) | Great Blue Heron |
|---|---|---|---|---|
| Length | 9–11 in (23–28 cm) | ~8.75 in (22 cm) | ~5.25 in (13 cm) | ~46 in (117 cm) |
| Body shape | Egg/teardrop | Compact, crested | Tiny, round | Long, angular |
| Bill type | Stout, tapered | Conical, heavy | Small, pointed | Dagger |
| Key drawing challenge | Round breast, colour zones | Crest silhouette | Tiny proportions | S-curve neck |
Identifying the American Robin: A Field-to-Sketchbook Guide
Adult Male Plumage: Colours and Contrast to Capture
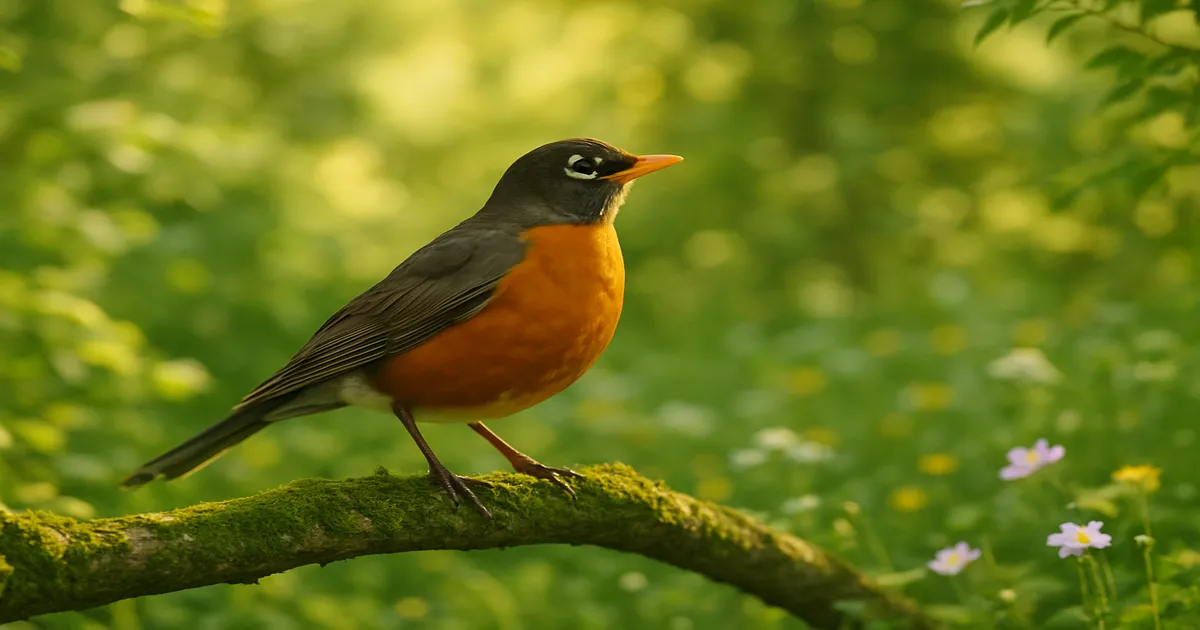
The adult male Robin is a study in contrast. The head is jet black — not dark gray, not charcoal — which makes the broken white eye arcs pop dramatically. Those arcs sit above and below the eye without forming a complete ring, and that detail matters if you want the drawing to read as a Robin rather than a generic thrush.
The breast runs from brick-red to deep orange-red depending on the individual and the light. The back is slate gray. The bill is yellow-orange, darkening slightly toward the tip. When blocking in colour zones, treat the breast as the warmest, most saturated area of the whole bird — it’s where the eye should land first.
Adult Female Plumage: Practising Tonal Gradation
The female Robin is subtler. Her head is dark gray rather than black, which softens the contrast with the white eye arcs. Her breast is a washed-out terracotta rather than the male’s vivid brick-red. Her back runs warmer and browner than the male’s cool slate.
Draw the female before the male if you want to develop tonal control. The muted palette forces you to work with value relationships rather than relying on bold colour contrasts to carry the drawing.
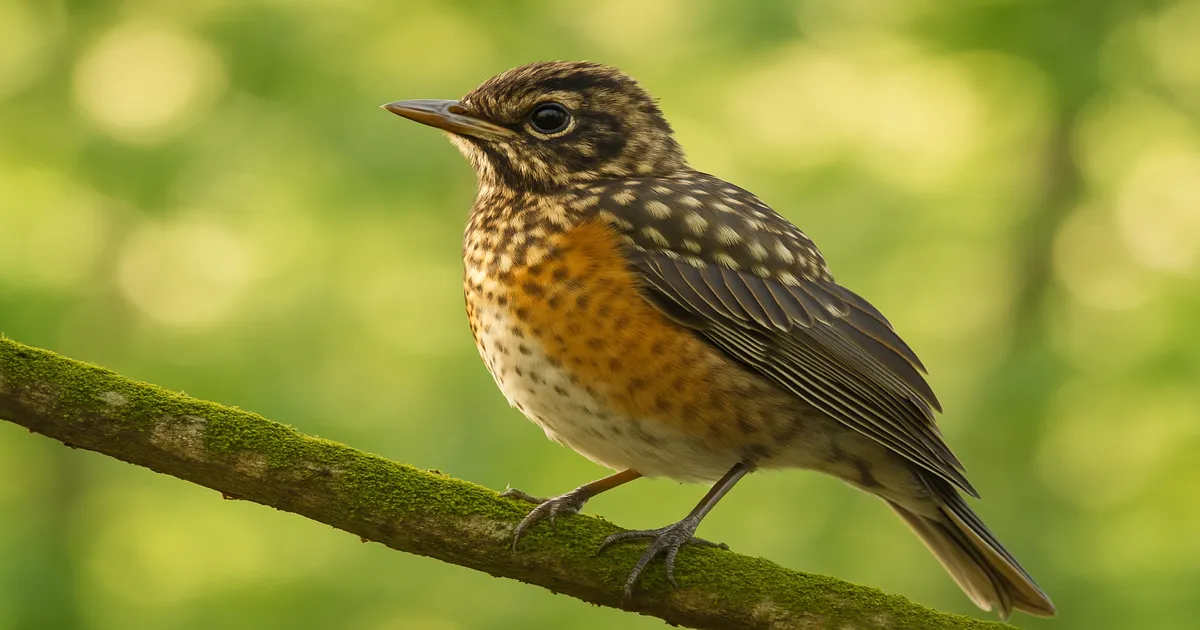
Juvenile Robin: Spots, Texture, and Complexity
Juvenile Robins look like someone smudged the adult plumage. The breast carries heavy dark spots on a pale orange-buff ground — a pattern shared with other thrushes that reveals the family resemblance. The back shows pale buff spotting too.
If you want to practise rendering feather texture, a juvenile Robin in late summer is one of the best subjects available. Each spot is a slightly different shape and size, which trains your eye to vary marks rather than repeating a mechanical pattern.
Critical Field Marks: Artist Checklist
Before you put pencil to paper, run through these six points:
- ✅ Round, full breast — the widest point of the body
- ✅ Brick-red to orange-red underparts (vivid in males, muted in females)
- ✅ Dark head with broken white eye arcs above and below the eye
- ✅ Yellow-orange bill, slightly darker at the tip
- ✅ White undertail coverts (visible in flight and when the tail is raised)
- ✅ Upright, alert posture — legs near body centre
Step-by-Step: How to Draw a Bird Drawing of a Robin
Step 1 — Block In the Basic Shapes
Draw an egg shape for the body, wider end forward (that’s the breast). Add a circle for the head, slightly smaller than you think it should be — beginners almost always make it too large. The head should sit at the front-upper edge of the body, not perched on top of it. Press lightly; these are construction lines you’ll refine or erase later.
Step 2 — Establish Proportions and Posture
Place the bill at the front of the head circle — a short, tapered wedge pointing slightly downward. Mark the eye roughly in the centre of the head circle, slightly forward. Draw two thin vertical lines for the legs, attaching them near the middle of the body egg. This placement is what gives the Robin its upright stance. Too far back and the bird leans forward; too far forward and it looks like it’s about to topple.
Step 3 — Add the Silhouette and Tail
Connect the head circle and body egg into a smooth, continuous outline. The breast should curve outward generously — this is the Robin’s most distinctive shape feature. Draw the tail extending back from the body: medium length, slightly rounded at the tip. Sketch the folded wing edge along the back, running roughly parallel to the top of the body, with the wingtip falling just short of the tail tip.
Step 4 — Map the Field Marks and Colour Zones
Block in the colour zones as flat areas — no shading yet. The entire head is black (dark gray for females). The breast and belly are orange-red, running from the throat down to the undertail coverts, where it transitions to white. The back, wings, and tail are slate gray.
Draw the broken white eye arcs — a short arc above the eye and a shorter one below, not connected. Mark the bill yellow-orange. This is the step where your drawing starts to unmistakably read as a Robin.
Step 5 — Refine Details, Feather Texture, and Shading
Add shading to convey the round breast — lightest at the centre where light hits, darker toward the edges where the form curves away. Use short, directional strokes to suggest feather texture on the wing coverts. The breast feathers lie flatter and smoother, so keep texture there subtle.
A few tips for this stage:
- The head-tilt foraging pose (head angled sideways toward the ground) makes a far more dynamic composition than a straight profile — try it once you’re comfortable with the basic standing pose
- In flight, the Robin’s round breast and relatively short tail create a “football with wings” silhouette — a great warm-up sketch for practising flight poses
- Add the faint white streaking on the black throat last — it’s easy to overdo
Drawing Other Common North American Birds
Northern Cardinal: Crest and Conical Bill
The Northern Cardinal is about 8.75 inches (22 cm) long, but its dramatic crest makes the head silhouette look much larger. The crest changes shape constantly — raised when the bird is alert, flattened when relaxed — so decide on a pose before you start. The conical bill is heavy and seed-cracker shaped, not the tapered wedge of a Robin. Artist tip: Draw the bill as two triangles meeting at a point, then round the edges slightly.
Blue Jay: Barred Wings and Bold Necklace
The Blue Jay (Cyanocitta cristata) is roughly 11 inches (28 cm) long and shares the Robin’s upright posture. The real drawing challenge is the wings — barred blue-and-black patterns with white spots that require careful attention to the direction and spacing of each bar. The bold black “necklace” running across the throat is the bird’s most graphic feature. Get that shape right and the rest of the drawing falls into place.
Black-capped Chickadee: Tiny Round Body
At just 5.25 inches (13 cm), the Black-capped Chickadee is one of the smallest commonly drawn birds, and its proportions are almost comically round. The head is enormous relative to the body, and the tail is surprisingly long for such a tiny bird. Artist tip: Exaggerate the roundness — it won’t look wrong, it’ll look right.
Great Blue Heron: S-Curve Neck and Dagger Bill
The Great Blue Heron is massive — about 46 inches (117 cm) — and its most challenging feature is the S-curved neck. In a resting pose, the neck vertebrae compress into a thick S, making the neck look almost as wide as the head. Many beginners draw it as a straight column, which looks stiff. Artist tip: Draw the neck curve first, then build the head and body around it.
Ruby-throated Hummingbird: Needle Bill and Hovering Posture
The Ruby-throated Hummingbird (Archilochus colubris) at just 3.75 inches (9.5 cm) is the ultimate test of proportion control. The bill alone is nearly a third of the bird’s total length. In a hovering pose, the wings are a blur — render them as soft, semi-transparent ovals rather than trying to draw individual feathers. The iridescent gorget on the male shifts from black to brilliant ruby depending on the light angle, making it a great opportunity to practise colour-shift shading.
Field Observation Tips for Better Bird Drawings
Best Times and Places to Watch Robins Up Close
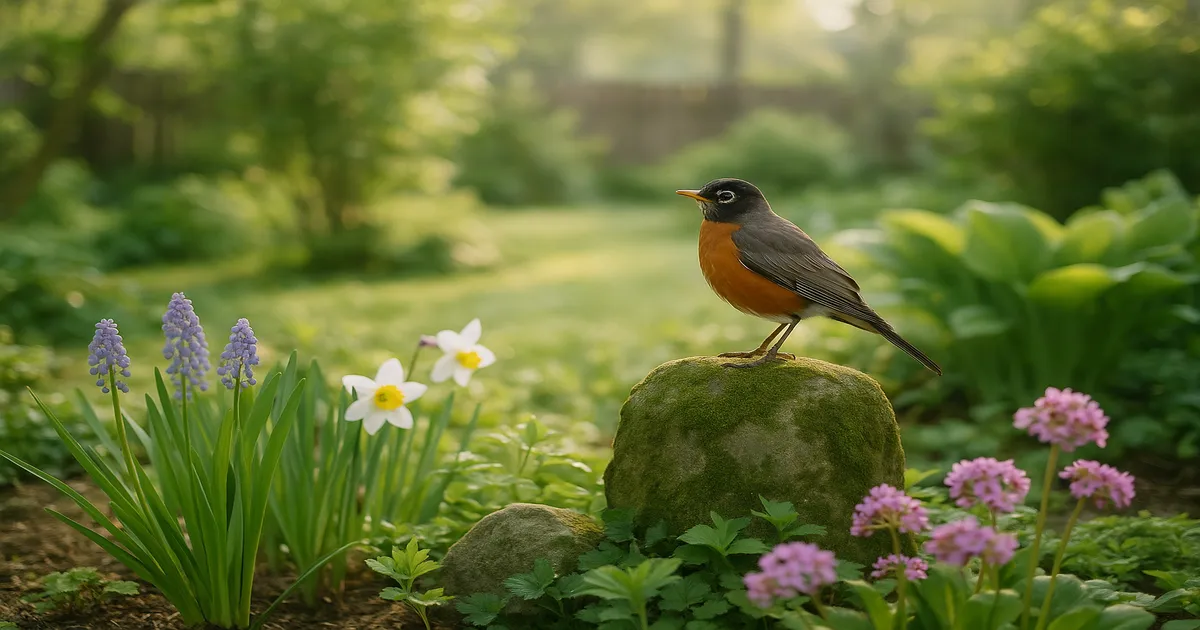
Suburban lawns after spring rain are the best place to observe Robins at close range. Earthworms come to the surface, and the birds are so focused on foraging they’ll tolerate a patient observer within a few metres. Early morning is best — the lawn is still wet and the light is warm and directional.
In winter, check fruiting crabapple and hawthorn trees in urban parks. Robin flocks of dozens — sometimes hundreds — will work through a heavily fruiting tree over a few hours, giving you plenty of time to observe flight postures, landing approaches, and social interactions. Robins don’t always migrate south; in mild winters across the northern US and southern Canada, large flocks regularly overwinter wherever fruit is available.
Capturing the Head-Tilt Foraging Pose
The Robin’s famous head-tilt is a visual behaviour, not an auditory one. The eyes are positioned on the sides of the head, so tilting gives one eye a direct downward view to spot earthworm movement near the soil surface. Knowing this helps you draw the pose with confidence: the eye closest to the ground is the active one. It’s one of the most compositionally satisfying poses in bird art — the diagonal of the tilted head creates tension and implies imminent action.
Using Photography as Drawing Reference
Golden-hour light is transformative for Robin photography. Warm morning or evening sun saturates the brick-red breast in a way that flat midday light simply doesn’t. Move slowly and indirectly when approaching a foraging bird; a direct approach will flush it every time.
Pre-focus on a perch the bird is using repeatedly — a fence post, a low branch — and wait for it to return. A mirrorless camera with a decent telephoto lens (Sony FE 100-400mm f/4.5-5.6 GM OSS) will give you sharp reference images even in low light. For flight shots, watch for the white flash of the undertail coverts as the bird launches.
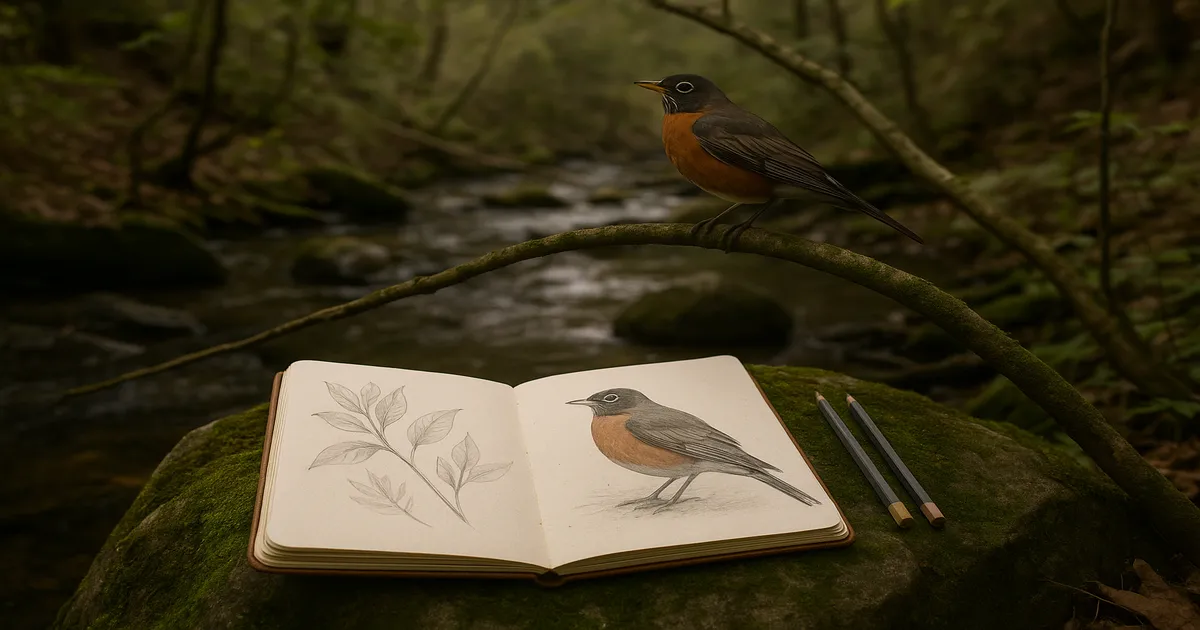
Sketching in the Field: Tools and Techniques
Keep your field kit simple: a small sketchbook (A5 or similar), a range of pencils from 2B to 4B (Staedtler Mars Lumograph 12-Piece Set), and a compact watercolour field set . The goal in the field isn’t a finished drawing — it’s a proportional sketch with written colour notes alongside it.
Write down observations like “breast brighter than I expected, almost fluorescent in morning sun” or “tail shorter than I thought relative to body.” These annotations are often more valuable than the sketch itself. Writing proportions as numbers — “head roughly 1/3 body width” — trains your eye faster than any other technique I know.
A good field guide propped open beside your sketchbook is worth its weight in gold for cross-referencing plumage details on the spot (Sibley’s Birds of North America).
Frequently Asked Questions
What is the easiest bird to draw for beginners? The American Robin is the easiest starting point. Its upright posture, clearly separated colour zones, and bold field marks make it forgiving to draw and easy to self-correct. A side-on standing pose is the simplest version to attempt first.
How do I make my bird drawing look realistic? Focus on proportions before details. A correctly proportioned bird with rough shading looks more convincing than a beautifully detailed bird with a head that’s too large. Once proportions are right, add shading to the breast to suggest roundness, and use short directional strokes on the wings to imply feather texture.
What pencils should I use for bird drawing? A 2B for initial construction lines, a 4B for darker areas like the Robin’s head and wing tips, and an HB for mid-tones and fine detail. A kneaded eraser is more useful than a standard one — you can shape it to lift tone from small areas without disturbing the surrounding marks.
How do I draw bird feathers without making them look like scales? Work in zones rather than individual feathers. Lay down the base tone for each feather tract first, then add short, overlapping strokes at the edges of each zone to suggest the scalloped boundary between groups. On the breast, keep strokes minimal — the feathers there are small and lie flat, so heavy texture marks will make the bird look rough rather than smooth.
How long does it take to learn to draw birds well? Most people see a real jump in quality after drawing the same species ten to fifteen times from different references. The first few attempts will look stiff; by the eighth or tenth, you’ll start to feel the proportions intuitively. Sketching in the field — even badly — accelerates this faster than studio practice alone.