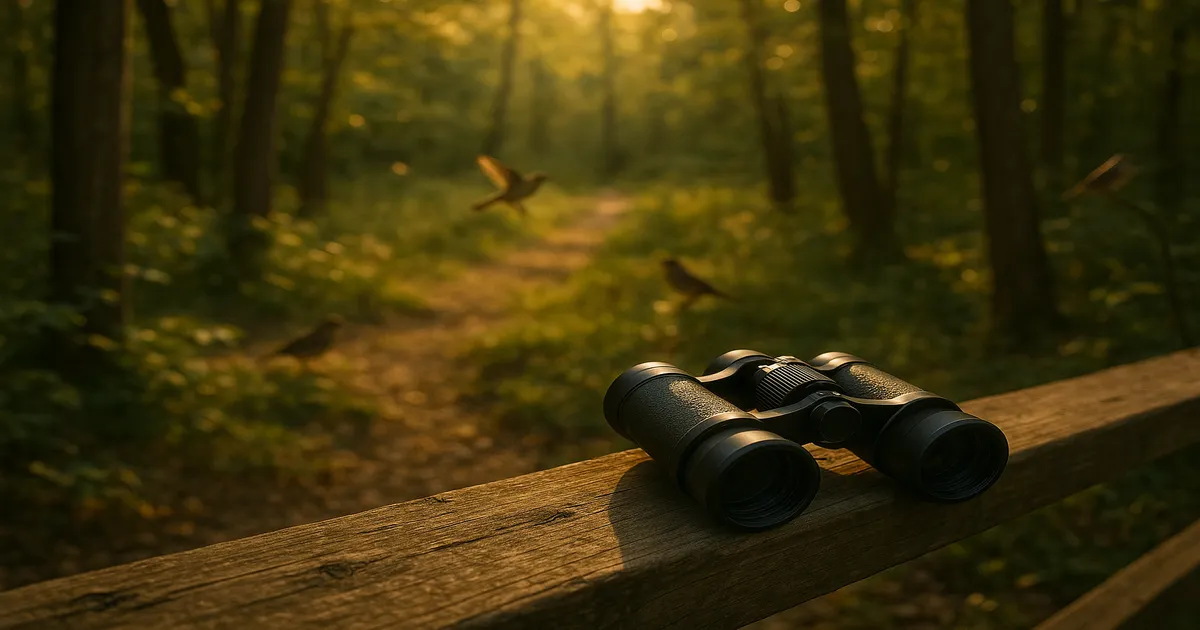
Quick Answer: For most beginners, the Vortex Diamondback HD 8x42 ($230) is the best birding binocular you can buy. It has excellent optics, a lifetime warranty with no receipt required, and it’ll last you years before you ever feel the need to upgrade. If your budget is tighter, the Nikon Prostaff P3 8x42 ($110) punches well above its price. Either way, go 8x42. You’ll thank yourself at the trailhead.
Most “best binoculars” lists rank fifteen pairs the author has never held. We’ll keep this simple: three budget tiers, one recommendation per tier, and an honest explanation of what actually matters when you’re trying to tell a Downy Woodpecker from a Hairy at forty yards.
Why Binoculars Matter More Than a Field Guide
Here’s a take that might surprise you: if you’re just getting into birding, your binoculars matter more than your field guide.
A field guide is useful. But you can identify most common birds with a free app on your phone. What you can’t do with your phone is get a clear, bright, steady look at a warbler flitting through the canopy at sixty feet. That’s the moment that hooks people on birding, and it only happens through decent glass.
Bad binoculars ruin that moment. They give you a dim, narrow, wobbly view that makes everything look like a sparrow-shaped blur. You end up frustrated, assuming birding just isn’t for you, when really your binoculars were the problem.
Good binoculars do the opposite. They make the world feel closer, sharper, more alive. You notice the iridescent gorget on a hummingbird. You see the yellow eye-ring on a Solitary Vireo. Those details are what turn casual interest into a lifelong hobby.
So before you spend $35 on a Sibley guide, spend $100-$230 on binoculars that won’t let you down.
Understanding Binocular Specs (Without the Jargon)
Every pair of binoculars has two numbers stamped on it, like 8x42 or 10x42. Here’s what they mean:
| Spec | What It Means | Why It Matters |
|---|---|---|
| First number (e.g., 8x) | Magnification power | How many times closer things appear |
| Second number (e.g., 42) | Objective lens diameter (mm) | How much light the binoculars gather |
| Exit pupil (calculated) | Objective / Magnification | Brightness of the image; bigger = brighter |
| Field of view | Width of visible area at 1,000 yards | How much landscape you see at once |
| Close focus | Minimum focusing distance | How near you can focus on a bird |
| Eye relief | Distance from eyepiece to your eye | Critical if you wear glasses |
The two specs that matter most for beginners are magnification and objective lens size. Everything else is secondary.
The Exit Pupil Trick
Divide the objective lens by the magnification. An 8x42 gives you a 5.25mm exit pupil. A 10x42 gives you 4.2mm. Bigger exit pupil means a brighter image, especially in dawn and dusk light, which is exactly when the best birding happens. Point to the 8x42.
The 8x42 vs 10x42 Debate
8x42 is the right answer for almost everyone. 10x42 fans will argue, and they’re not wrong, but beginners benefit more from the wider field of view.
Here’s why:
| Factor | 8x42 | 10x42 |
|---|---|---|
| Magnification | 8x (plenty for most birding) | 10x (slightly closer view) |
| Field of view | Wider (~420 ft at 1,000 yds) | Narrower (~340 ft at 1,000 yds) |
| Image stability | More forgiving of shaky hands | Amplifies hand shake |
| Brightness | Brighter (5.25mm exit pupil) | Slightly dimmer (4.2mm exit pupil) |
| Finding birds | Easier (wider view) | Harder (narrower view) |
| Best for | Woodland, general birding | Open water, shorebirds, raptors |
The extra magnification of 10x42 sounds appealing, but the tradeoff is real. When you’re scanning a tree canopy for a skulking warbler, that wider field of view is the difference between finding the bird and spending thirty seconds panning around while it flies off. For beginners still building their “search image,” 8x42 wins every time.
If you primarily bird at open shorelines, hawk watches, or expansive wetlands, 10x42 is a reasonable choice. But for your first pair? Go 8x42.
Key Features to Actually Care About
Close Focus Distance
This is the minimum distance at which you can focus. For birding, you want 6 feet or less. You’d be surprised how often a bird lands ten feet away from you, and nothing is more frustrating than having it too close to focus on. Most decent birding binoculars hit 5-6 feet. Check it before you buy.
Eye Relief (Glasses Wearers, Read This)
If you wear glasses, you need at least 15mm of eye relief, ideally 16-18mm. This is the distance between the eyepiece and where the full image forms. Too little eye relief with glasses means you lose the edges of your view and get annoying black vignetting. Most modern birding binoculars handle this well, but verify it on the spec sheet.
Field of View
Measured in feet at 1,000 yards. For birding, anything above 380 feet is good, above 400 feet is great. Wider field of view means you find birds faster and can track them more easily as they move.
Weight
Full-size 8x42 binoculars typically weigh 21-26 ounces. That might not sound like much, but you’ll carry them around your neck for hours. Under 24 ounces is ideal. Over 28 ounces and your neck will remind you about it by mid-afternoon. A good harness strap (like the Opticron or Cotton Carrier) helps more than you’d think.
Waterproofing and Fog-proofing
Any binocular worth buying in 2026 should be nitrogen-purged and O-ring sealed. This isn’t a premium feature anymore; it’s table stakes. If the pair you’re looking at doesn’t mention waterproofing, put it back on the shelf.
Budget Tiers: What Your Money Gets You
Entry Level: $50-$100
At this price, you’re getting functional binoculars with compromises. The glass coatings will be basic, the build quality will be plasticky, and the image might soften at the edges. But you’ll still see birds better than with your naked eye, and that matters.
The honest truth: this tier has improved dramatically in the last five years. A $75 pair today would have been a $150 pair in 2020.
Best in tier: Nikon Prostaff P3 8x42 (~$110)
The Prostaff P3 slightly exceeds this tier’s ceiling, but it’s worth the stretch. Nikon’s optics are reliably good, the 5.6-foot close focus is solid, and at 21 ounces, it’s lighter than most competitors. The image quality is noticeably better than anything below $80. It’s the binocular I recommend most to friends who ask.
The Sweet Spot: $100-$200
This is where quality jumps significantly. You’ll get fully multi-coated lenses, better edge sharpness, more durable construction, and tighter quality control. For most birders who don’t want to agonize over the decision, this tier has the best value per dollar.
Best in tier: Vortex Crossfire HD 8x42 (~$170)
The Crossfire HD gets you into Vortex’s ecosystem with their incredible VIP warranty (unconditional, lifetime, transferable, no receipt needed). The HD glass provides crisp color and good contrast, and the 6-foot close focus works well for songbirds at close range. At this price, it’s hard to find a meaningful flaw.
Serious Beginner: $200-$300
At this tier, you’re getting binoculars that will satisfy you for years, possibly forever. The optical coatings are excellent, the build quality is professional-grade, and the image is bright, sharp, and color-accurate across the entire field of view. Many experienced birders carry glass in this range as their daily pair.
Best in tier: Vortex Diamondback HD 8x42 (~$230)
Our overall top pick for beginners. The Diamondback HD delivers optics that genuinely compete with binoculars at $400-$500. The image is bright and crisp, close focus hits 5 feet, and the rubber armor handles drops without drama. It comes with the same unconditional Vortex warranty. If you can afford it, buy this and stop looking.
Runner-up: Maven C.2 8x42 (~$275)
Maven is a smaller, direct-to-consumer brand based in Wyoming. The C.2 has slightly better edge-to-edge sharpness than the Diamondback, and Maven lets you customize the color scheme when you order. The warranty is excellent. If you like supporting smaller companies and want a binocular with some personality, Maven is a great choice. The tradeoff: they’re only sold through Maven’s website, so you can’t try them at a store.
Our Top Picks at a Glance
| Binocular | Price | Weight | Close Focus | Eye Relief | FOV (ft/1000 yds) | Best For |
|---|---|---|---|---|---|---|
| Nikon Prostaff P3 8x42 | ~$110 | 21.2 oz | 5.6 ft | 15.4mm | 398 ft | Budget-conscious beginners |
| Vortex Crossfire HD 8x42 | ~$170 | 24.2 oz | 6.0 ft | 15.0mm | 393 ft | Best value mid-range |
| Vortex Diamondback HD 8x42 | ~$230 | 22.6 oz | 5.0 ft | 16.0mm | 409 ft | Overall best for beginners |
| Maven C.2 8x42 | ~$275 | 22.9 oz | 5.0 ft | 16.5mm | 408 ft | Premium feel, small brand |
What to Skip
Not everything on the shelf deserves your money. Here are the common traps:
Zoom Binoculars (8-24x50, etc.)
If the magnification is a range, walk away. Zoom binoculars sacrifice optical quality at every magnification to offer flexibility at none of them. They’re dim, soft, and heavy. Fixed-magnification binoculars will outperform them at every price point. There’s a reason no serious birder uses zoom glass.
Compact Binoculars (8x25, 10x25) as Your Primary Pair
Compact binoculars have a role: they’re great as a packable backup for hiking or travel. But as your primary birding optic, they fall short. The small objective lens gathers less light, which means a dimmer image. The narrow field of view makes finding birds harder. And holding a tiny binocular steady for extended viewing is surprisingly difficult. Buy a compact pair later for your day pack. Start with full-size 8x42.
Anything Under $40
I wish I could tell you otherwise, but binoculars under $40 are almost universally disappointing. The coatings are poor, the alignment is often off (which causes eye strain and headaches), and they fall apart quickly. You’ll end up buying twice. The Nikon Prostaff P3 at $110 is the floor for a genuinely good birding experience.
Ruby-Coated or “Night Vision” Binoculars
If the lenses have a red tint or the packaging mentions “night vision,” these are marketing gimmicks. Ruby coatings reduce glare but also reduce light transmission, which is the opposite of what you want for birding. Real night vision requires powered electronics and costs thousands. Skip these entirely.
How to Test and Adjust Your Binoculars
You’ve bought a pair. Now set them up properly, because most beginners never do this and wonder why their view looks off.
Step 1: Adjust the Interpupillary Distance
Fold the barrels in or out until you see a single, perfectly circular image. If you see two overlapping circles or a figure-eight shape, the barrels aren’t matched to the distance between your eyes. This takes three seconds and makes an enormous difference.
Step 2: Set the Diopter
One of your eyes is probably slightly stronger than the other. Your binoculars have a diopter adjustment ring (usually on the right eyepiece) to compensate:
- Close your right eye. Focus with the center wheel until the image is sharp through your left eye.
- Now close your left eye. Without touching the center wheel, turn the diopter ring until the image is sharp through your right eye.
- Open both eyes. Everything should be crisp. You only need to do this once.
Step 3: Practice Finding Birds
This sounds silly, but it’s a real skill. Start by looking at a bird (or any object) with your naked eyes. Without moving your head, bring the binoculars straight up to your eyes. The object should be in your field of view. If it’s not, you’re tilting your head or moving the binoculars. Practice with stationary objects like fence posts and signs until it becomes muscle memory. On my first birding walk, I spent more time searching for birds in my binoculars than actually watching them. The muscle memory comes faster than you’d expect, usually within a few outings.
Step 4: Use a Harness, Not a Neck Strap
The included neck strap works, but after an hour of birding, it digs in. A binocular harness distributes the weight across your shoulders and keeps the binoculars snug against your chest. It’s a $20-$30 upgrade that transforms comfort on long walks.
Frequently Asked Questions
Are expensive binoculars really worth it over budget pairs?
Up to about $250, every dollar you spend buys a meaningful improvement in image quality, build durability, and comfort. You’ll notice brighter images, sharper edges, and smoother focus wheels. Beyond $300, the improvements become incremental and harder to appreciate without direct side-by-side comparison. For beginners, the $100-$250 range offers the best return on investment. You don’t need to spend $800 on Swarovski glass to enjoy birding, but the jump from a $50 pair to a $150 pair is genuinely dramatic.
Can I use my old hunting or marine binoculars for birding?
You can, but they’re usually not ideal. Hunting binoculars are often designed for low-light performance at longer ranges and tend to be heavier. Marine binoculars prioritize waterproofing and stabilization over close focus distance. The biggest issue is usually close focus: many hunting and marine optics can’t focus closer than 15-20 feet, which makes them frustrating for songbirds in a backyard setting. If you already own a pair, try them out before buying new, but don’t be surprised if dedicated birding optics feel like a significant upgrade.
Do I need image-stabilized binoculars for birding?
For most birding situations, no. Image-stabilized binoculars (like the Canon IS series) are excellent but expensive, typically starting around $500. They shine at higher magnifications (10x, 12x) where hand shake is more noticeable, and they’re popular for pelagic birding on boats where everything is moving. For land-based birding with 8x42 binoculars, normal hand steadiness is perfectly fine. Spend that extra money on a better standard pair rather than a mediocre stabilized one.
How do I clean my binoculars without scratching the lenses?
Use a lens pen or a microfiber cloth with lens-specific cleaning fluid. Never use tissues, paper towels, or your shirt, as they can contain wood fibers or grit that scratches lens coatings. Start by blowing off loose dust with a blower bulb or gentle breath, then wipe in a circular motion from the center outward. Most quality binoculars have coated lenses that resist smudges, so you’ll clean them less often than you’d expect. Keep the lens caps on when the binoculars are around your neck but not in use.
Should I buy binoculars online or in a store?
If you have a local outdoor or birding store, trying binoculars in person is genuinely valuable. You can feel the weight, check the eye relief with your glasses, and compare image quality side by side. That said, most people don’t live near a specialty optics store. Buying online from a reputable retailer with a good return policy works perfectly well. Both Vortex and Maven have generous return windows, and Nikon products are widely available at major retailers. Buy from an authorized dealer to ensure your warranty is valid, and avoid suspiciously cheap listings on marketplace sites, as counterfeit binoculars are a real problem in the sub-$100 range.